

Installing Home Assistant
Home Assistant Beginner’s Guide 2022 : Part 1
Everything You’ll Need…

Here is the raspberry pi kit I used. It includes everything you need; a case, micro SD card, power supply, and more. It’s an excellent value and includes a booklet to teach you even more about the raspberry pi.

You’ll need an ethernet cable to connect to your router. Any ethernet cable should work fine.

Only a select few SSDs work with Home Assistant, and this is one that I’ve had great luck with. It’s very affordable and has been working in my main Home Assistant build.

You’ll need and adapter to connect the SSD to your Raspberry Pi, unless you use the case linked below.

This is the case I use for my Home Assistant. The case in the kit linked above works just fine, in fact it was the case I used for months. I like this one because it holds my Raspberry Pi and SSD in one case.
Let’s Start Setting This Up


Step 1: Connect your micro SD card to your computer.
The kit linked above has a micro SD to USB adapter and a micro SD card included.

Step 2: Download Raspberry Pi Imager. It’s a free software developed by the Raspberry Pi Organization. It makes this process so easy. The software works with Mac, Linux, and Windows

Step 3: Open Pi Imager and you may have to give it permissions. Then click the Choose OS button.

Step 4: Scroll down to Misc Utility Images

Step 5: Select Bootloader

Step 6: Select USB Boot

Step 7: Select Choose Storage
Make sure your micro SD card is connected to your computer.

Step 8: Select the Micro SD Card.
Make sure to select the micro SD card as this will erase everything on the drive you select.

Step 9: Click Write and then click Yes on the popup window.
Last warning about making sure you are selecting your micro SD card.

Step 10: Once the Pi Imager is done writing to your card, remove it from your computer and insert it into the micro SD slot in you Raspberry Pi
The card slot on the bottom of the Pi and the writing on the card will face away from the Pi.

Step 11: Power on the Raspberry Pi by connect the USB C cable to the power port (the far left one). The lights will then start flashing. Let this run for about ten minutes before removing the power cable from the Pi.
This is writing to the Pi a script, telling it to boot from a USB drive next time. We can undo this in the future if we need to.

Step 12: Connect you SSD to your USB adapter and then connect the adapter to your computer.

Step 13: Back in Pi Imager, select Choose OS

Step 14: Scroll down to Other Specific Purpose OS

Step 15: Scroll down to Home Assistant

Step 16: Select The Home Assistant OS (Rip 4/400)
This will download the latest version of Home Assistant for the Raspberry Pi 4

Step 17: Select Choose Storage
Make sure your SSD is connected to your computer

Step 18: Select the KINGSTON 240GB SSD
Remember to select the proper drive and not to erase your computer

Step 19: Select write and choose yes on the popup window

Step 20: Once Pi Imager is done writing to your SSD, make sure it is ejected from your computer and then connect it to one of your Pi’s USB 3.0 ports (one of the blue ones).
You don’t have to put your Pi in your case right now. In fact it might be best to wait until you know everything is working.

Step 21: Connect your ethernet cable from the Pi to your WiFi Router and then power on your Pi.

Step 22: On a web browser window, go to homeassistant.local:8123 (it may take up to 10 minutes before the page shows anything)
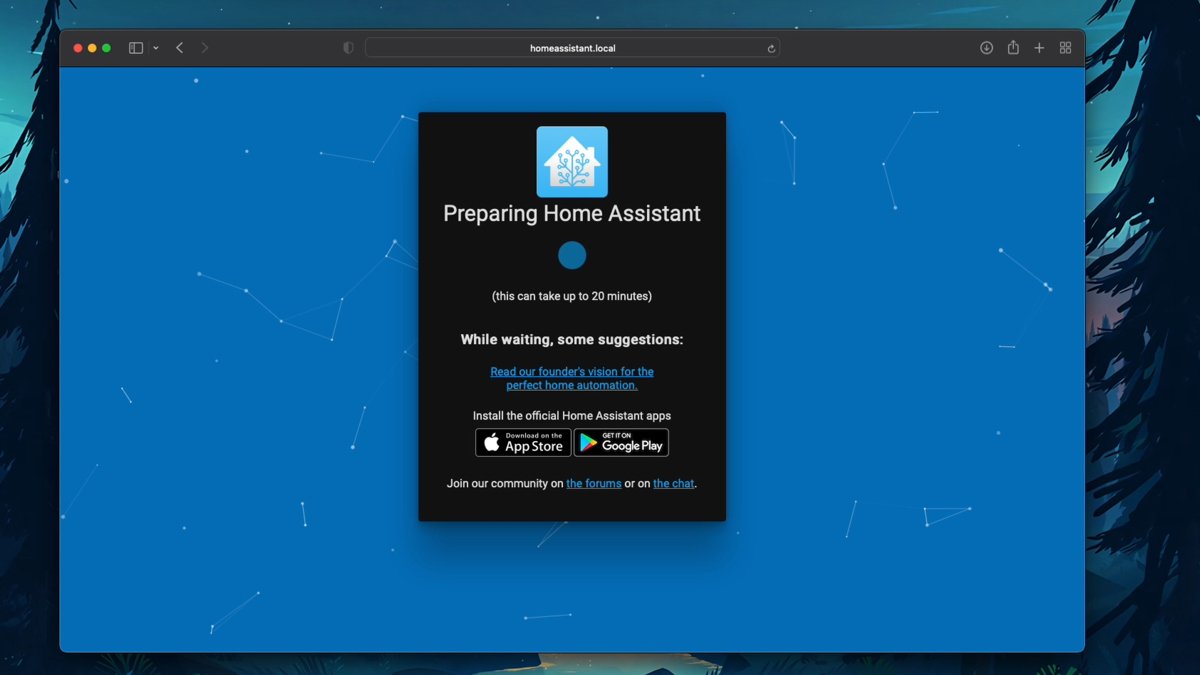
Step 23: Once your Pi is booted, you’ll then see this screen that Home Assistant is preparing for setup. This page will refresh automatically when it is finished.

Step 24: The page will refresh and then you can create your first user account.
I recommend creating a strong password and making sure it is one you can remember.

Step 25: You can then name your Home Assistant Server. I recommend giving Home assistant your location (doesn’t have to be super accurate, but it will be helpful if it is).
I would also recommend entering your elevation (you can always google your the elevation for your city if you are unsure).
These are great for automations such as sunrise and sunset based automations.
And don’t forget to make sure your system (Metric or Imperial) is set for your area.

*Optional * Step 26: I give Home Assistant usage statistics and crash reports. The information is anonymous and it helps make Home Assistant better for everyone.

Step 27: You can then start setting up and devices Home Assistant may have found on your WiFi Network, but I do have a guide on setting up devices.

Congratulations! You now have Home Assistant up and running. Check out my other guides for making your Home Assistant how you want it.