

Digital Dashboard - Part 2
This guide is broken into two parts. This part I show you how to setup your raspberry pi as a digital dashboard.
In Part 1, I show you how to mount your tv and sound bar to have a clean wire-free look to it.
If you have any questions, reddit is the best place right now for help from myself or others.

Download Raspberry Pi Imager
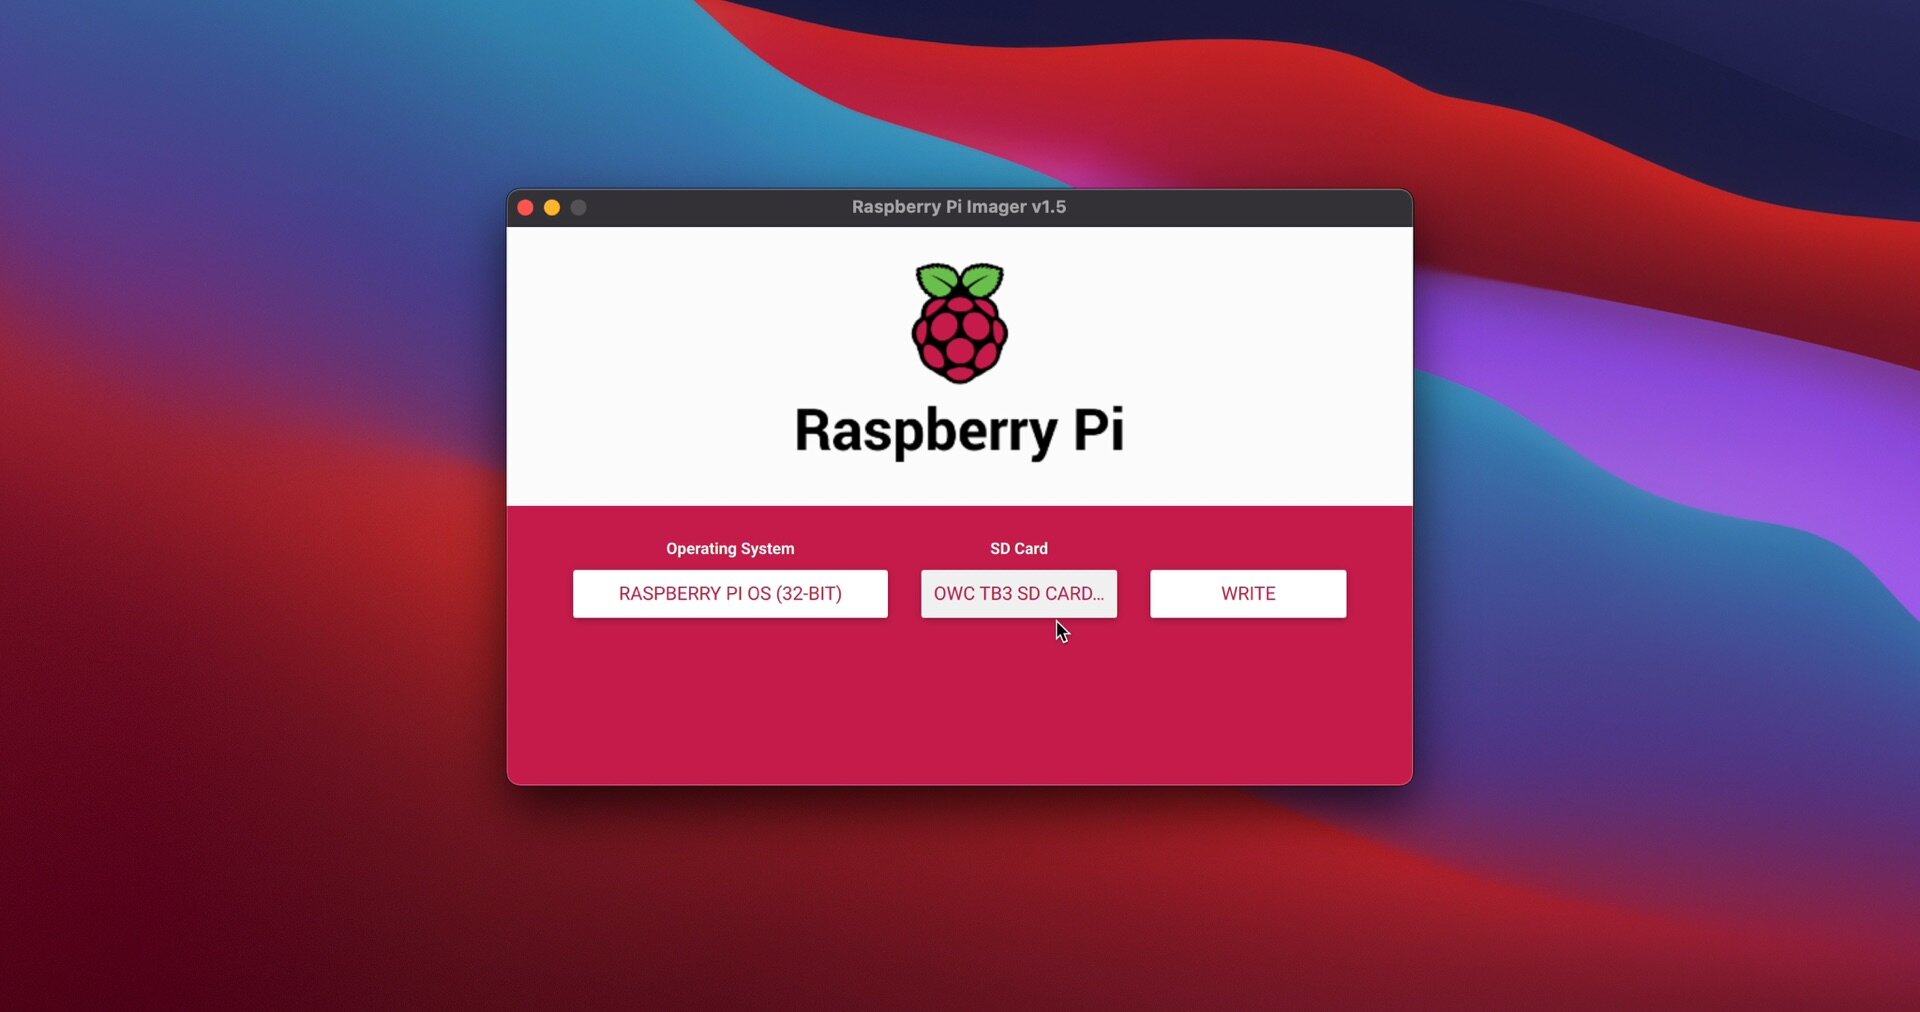
2. Insert micro SD card intro computer and press the “Operating System” button.
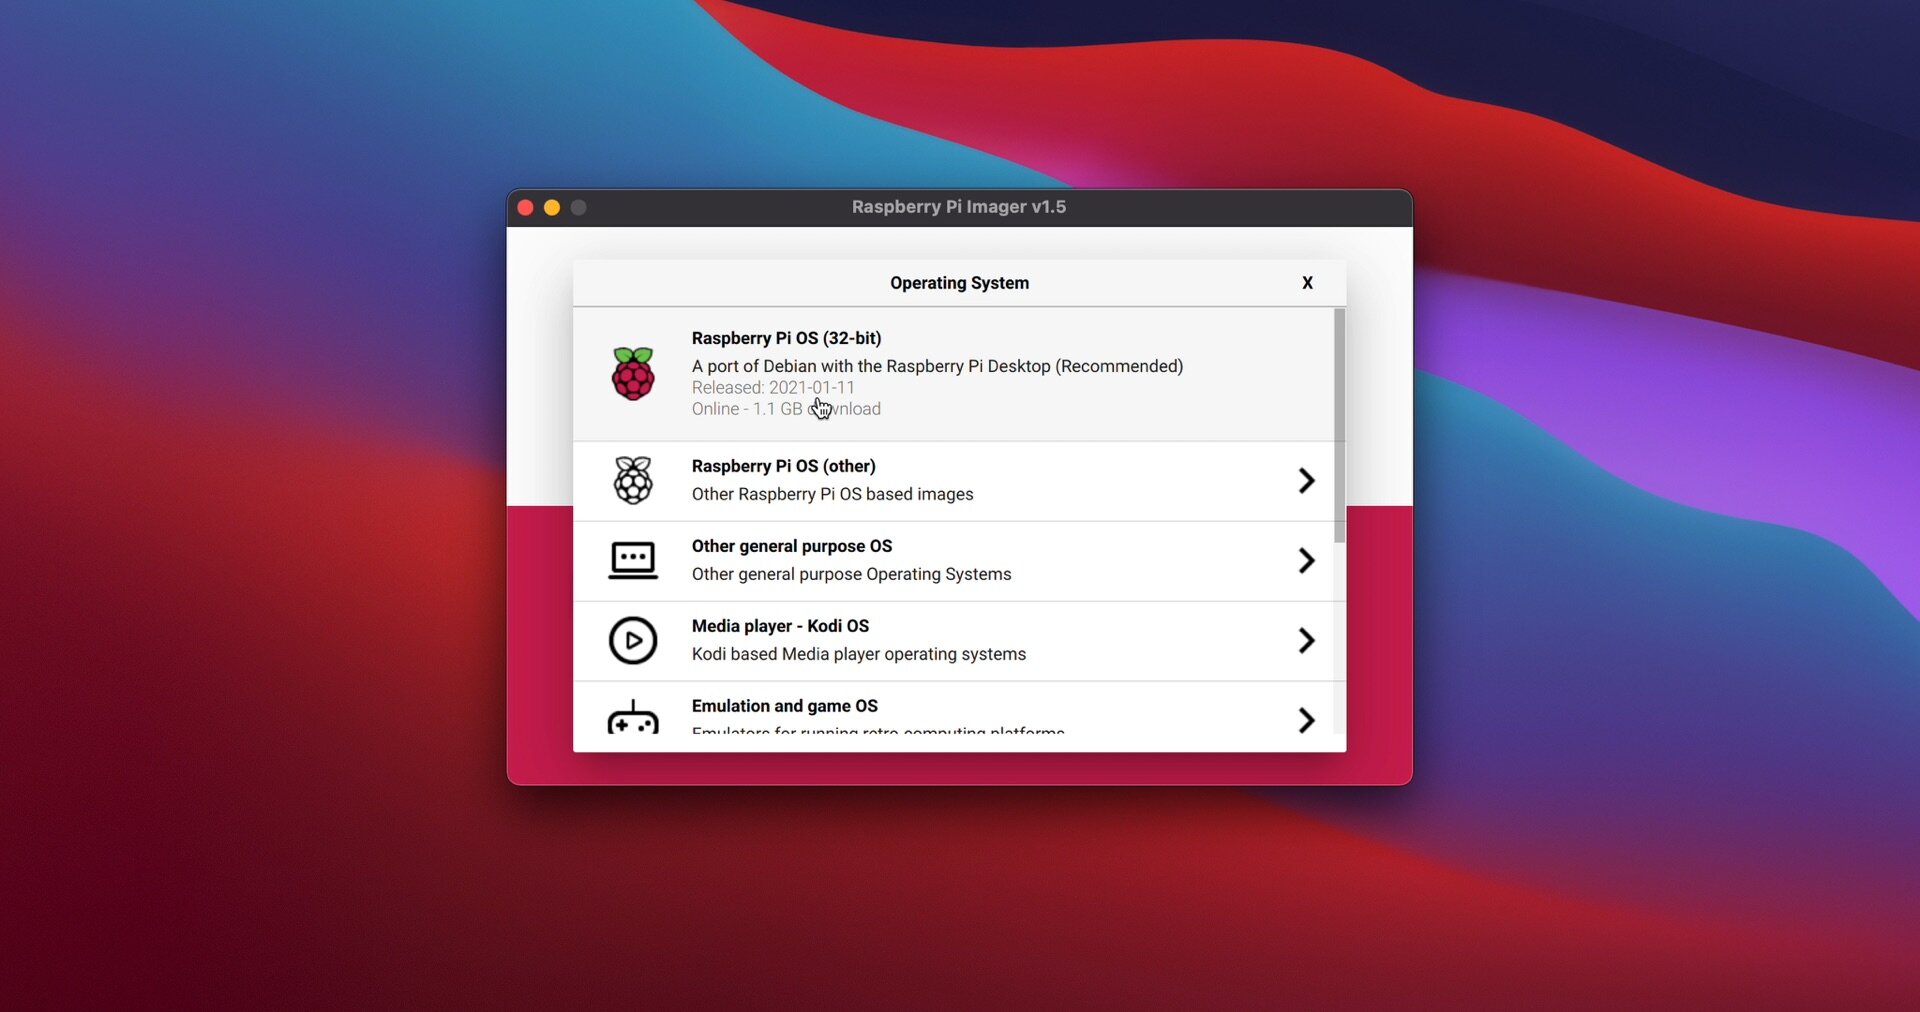
3. Select the Raspberry Pi OS (32-bit) unless you bought the 8GB model.
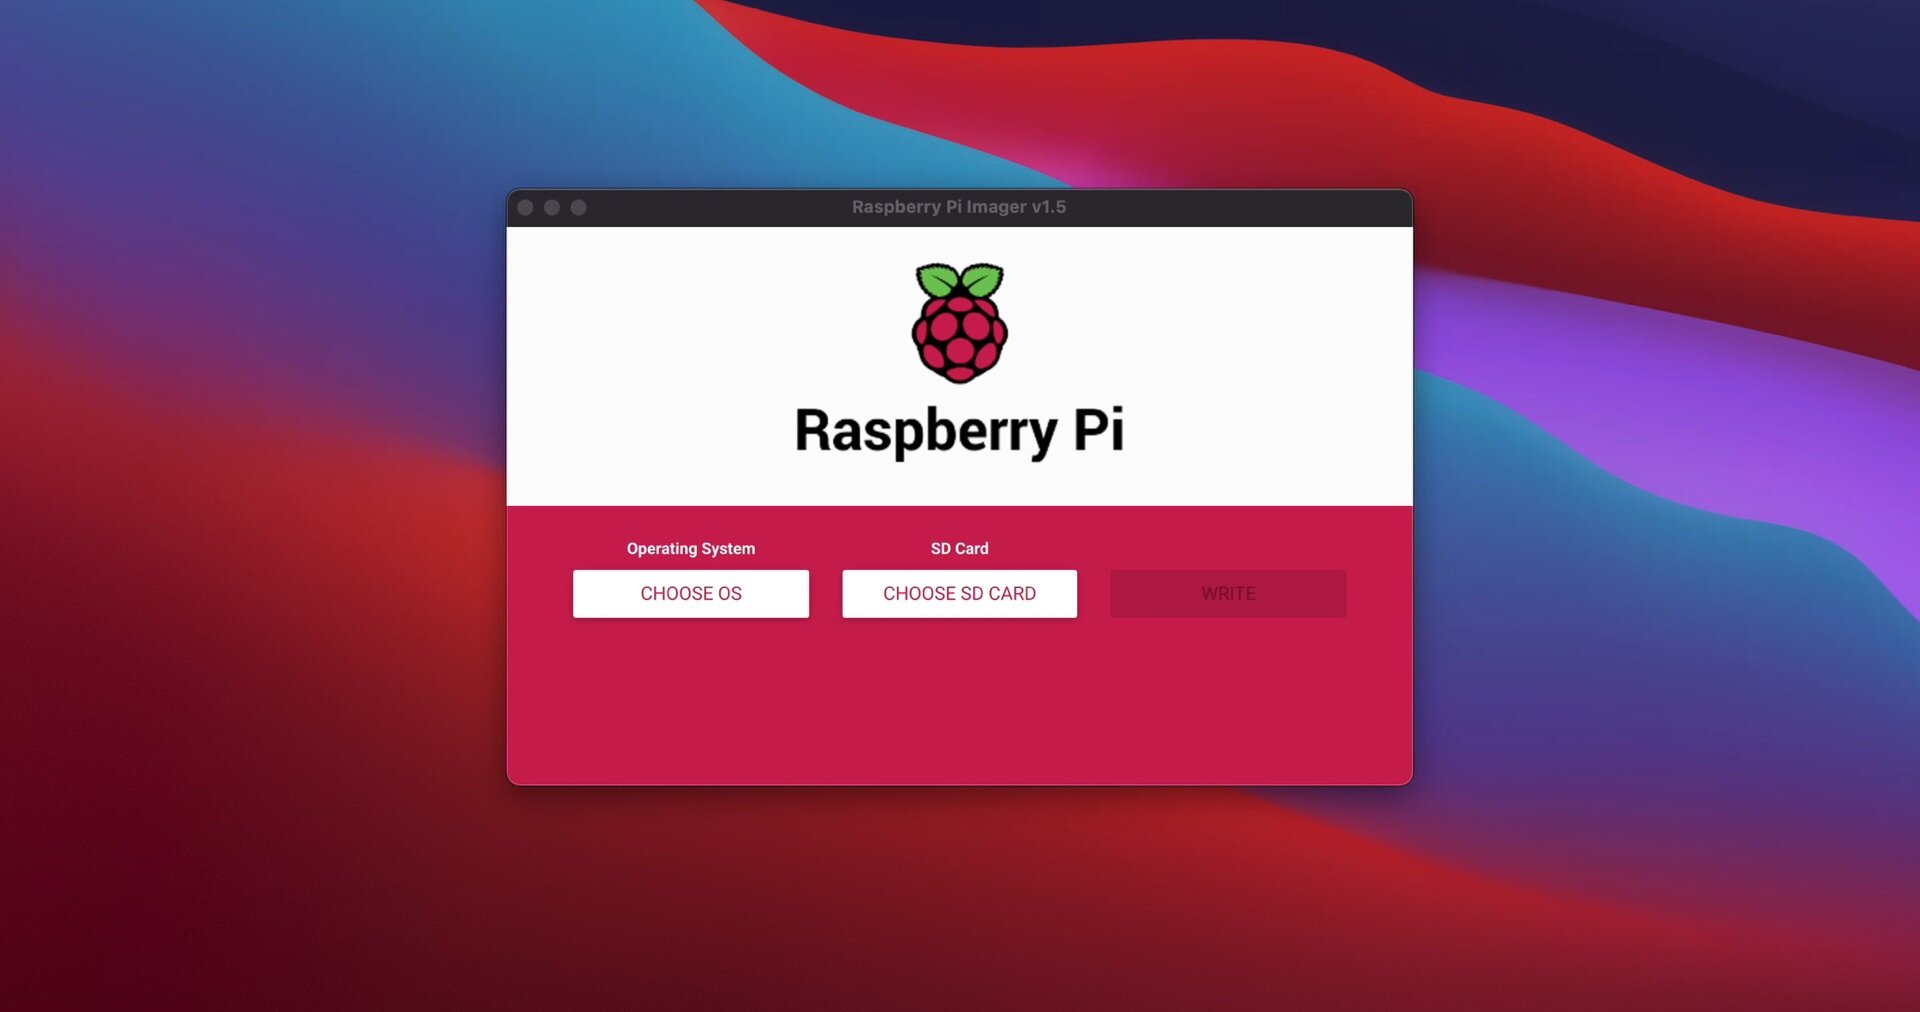
4. Choose your SD Card.
IMPORTANT TO PAY ATTENTION AND NOT FORMAT YOUR HARD DRIVE. PLEASE DOUBLE CHECK THAT YOU ARE SELECTING THE CORRECT SD CARD. THIS WILL ERASE EVERYTHING ON YOUR CARD.

5. Choose write. You may have to enter your computer password. This may take some time, depending on the speed of your card.
Eject card from computer once it is does, if the application did not already do so for you.

6. Insert the micro sd card into the raspberry pi.

7. Connect the micro HDMI cable to the left port labeled HDMI 0 and to your desired monitor or TV. Connect a usb mouse and keyboard to the USB ports. Connect the USB type C power cord to the far left port.

8. Once the pi is booted up, click next on the setup wizard to get started.

9. Select your country, language, and timezone. Select “Use US keyboard”, unless that doesn’t apply to you. But you obviously know that.
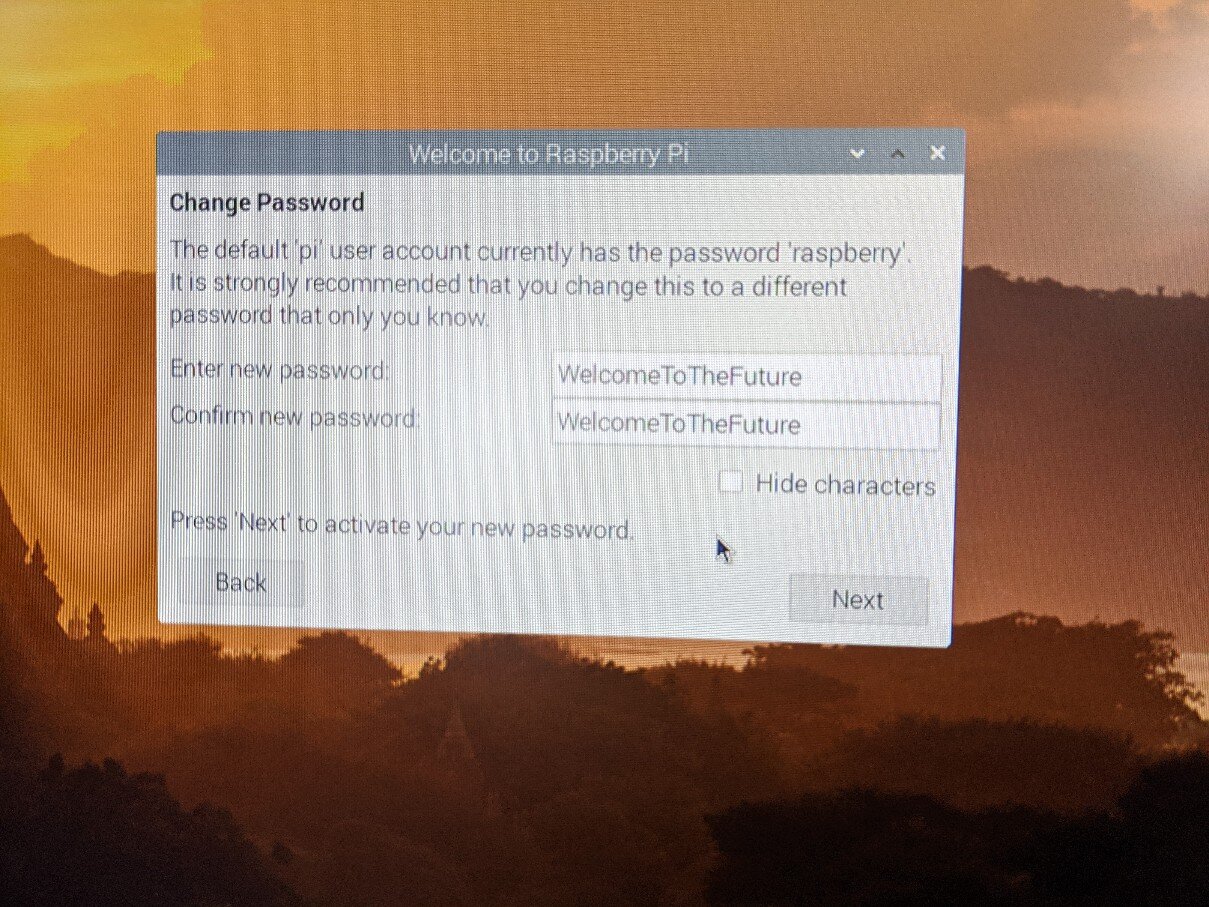
10. It is optional to set a new password, but please remember it if you do. The default password is "raspberry" and the default user name is “pi”. You can change the username later if you wish.

11. If you screen has black bars around it, make sure you select the box to have the pi adjust once the pi is restarted.

12. Select your Wifi.

13. You can check for updates, this takes a few minutes but nothing too crazy.

14. Once the update is finished, restart your pi.

15. Go to the magic mirror builder website to make sure you are still following along with the most current installation instructions (this will be easier if you do this on your pi by using the internet application in the upper left [the globe].

16. Open the terminal application in the upper left hand corner. Download and install the latest Node.js version by copying and pasting the command into the terminal window (you will have to right click and the paste to paste in terminal, you can not press control+v.)
curl -sL https://deb.nodesource.com/setup_10.x | sudo -E bash -
17. Copy the next line and wait for it to install
sudo apt install -y nodejs
18. Clone the repository and check out the master branch by copying and pasting the command into the terminal window.
git clone <https://github.com/MichMich/MagicMirror>
19. We will now install the Magic Mirror Software. First we need to go to that folder by copying and pasting this command.
cd MagicMirror/
20.Install the application by copying and pasting this command. This step may take some time.
npm install
21. Make a copy of the config sample file by copying and pasting the command into the terminal window
cp config/config.js.sample config/config.js

You can confirm this worked by checking the “config” folder (home/pi/MagicMirror/config). You should have two files, one called config.js and one called config.js.sample
This sample copy is like a master copy of all of the settings in case you screw something up when you are adjusting your modules. DO NOT LOOSE THIS OR OVERWRITE IT UNLESS YOU KNOW WHAT YOU ARE DOING.
22. Start the Magic Mirror application by copying and pasting the command into the terminal window
nom run start
This may take a bit to start the first time. Your screen should go black for a second before the modules begin to load. To exit the Magic Mirror application, press Control+Q
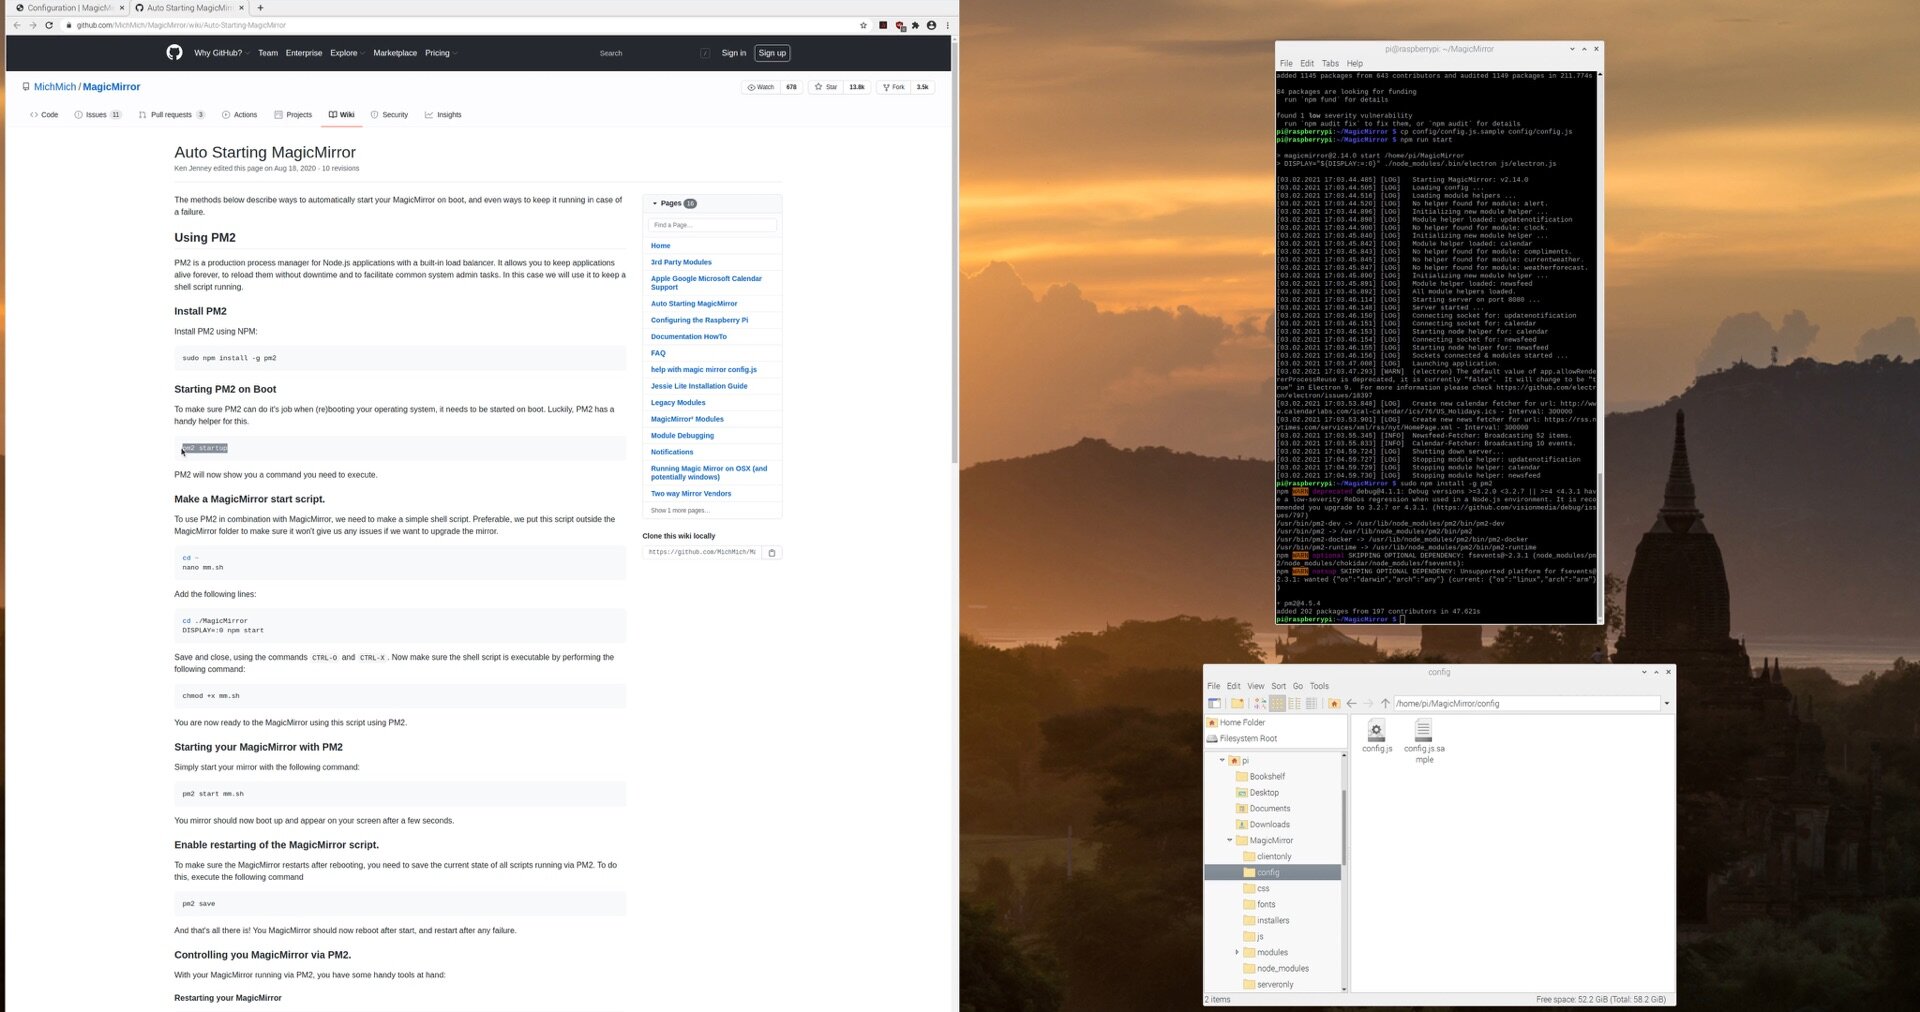
23. Follow the instructions here to have the Magic Mirror Application start automatically when your Pi boots up and to have the software restart if it crashes.
24. copy and paste the following command to install a program called PM2
sudo npm install -g pm2
25. To make sure PM2 can do it's job when (re)booting your operating system, it needs to be started on boot. Luckily, PM2 has a handy helper for this. Copy and paste
pm2 startup
PM2 will now show you a command you need to execute.
Make a MagicMirror start script.
26. To use PM2 in combination with MagicMirror, we need to make a simple shell script. Preferable, we put this script outside the MagicMirror folder to make sure it won't give us any issues if we want to upgrade the mirror. Copy and paste the following command:
cd ~ nano mm.sh
27. Add the following lines:
cd ./MagicMirror DISPLAY=:0 npm start
This will have the Magic Mirror software automatically start on HDMI 0, so you can still use HDMI 1 if you need to access your pi without closing the Magic Mirror software.
28. Save and close, using the commands:
CTRL-O and then CTRL-X
29. Now make sure the shell script is executable by performing the following command:
chmod +x mm.sh
Starting your MagicMirror with PM2
30. Simply start your mirror with the following command:
pm2 start mm.sh
You mirror should now boot up and appear on your screen after a few seconds. Press CTRL + Q to exit.
Enable restarting of the MagicMirror script.
31. To make sure the MagicMirror restarts after rebooting, you need to save the current state of all scripts running via PM2. To do this, execute the following command
pm2 save
Then press CTRL+X then press Y
And that's all there is! You MagicMirror should now reboot after start, and restart after any failure.